

|
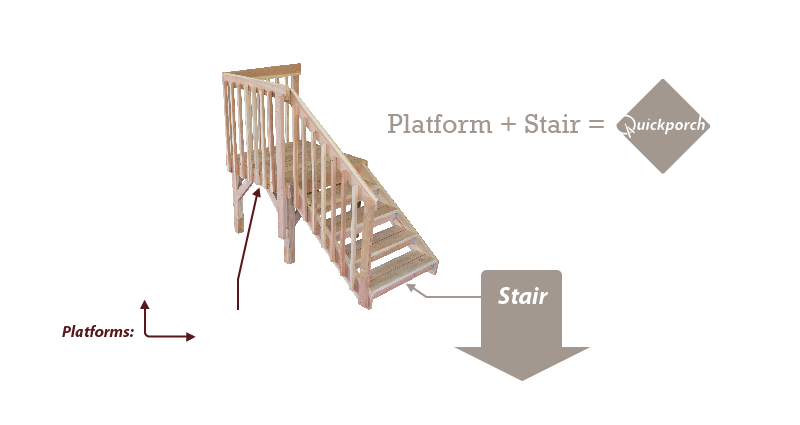
The Adustable StairMore about the Quickporch stair Measuring and Determining Stair NumbersYour total rise is the vertical distance between the top of the platform and the landing point of the stair. It is important to measure at your landing point because there may be a change in elevation between the point directly below the platform and the landing point. After you determine your total rise, decide how many steps and your rise per tread using the chart provided. Here is an alternative method to the chart:
|

Assembling the StairNotice that there are two lines of punch marks on the two stringers: 1) the line with more holes spaced closer together is for balusters 2) the other line, which has fewer holes spaced farther apart, is for treads. Start with one of the stringers laying on a flat surface with the inside of the stringer facing up. Each tread as two brackets, one on each side. Take one of the treads and determine which one of the brackets will connect to the the inside of this first stringer. Find the hole on the bracket that is the top and front (top front as the stair will be be once installed) and use one 1-1/4 in. screw to attach the tread at the last tread punch mark (this will be the tread closest to the ground). Also attach next tread with only one screw, and then do the same with the tread that will be closest to the deck. Now you have three treads each attached with one screw at their pivot points. These free-pivoting treads will help you make two lines for the cuts on the heal and the toe of the stringer. As shown on the video, adjust the first two treads so that when you measure from the top surface of the second tread to the top surface of the first tread is the same as your pre-determined rise per tread. (more about finding your rise per tread ...). Once these treads are positioned with the correct rise per tread, measure from the top surface of the bottom tread and mark your rise per tread on your stringer. Extend the mark on the toe of the stringer so that it is parallel to the bottom tread. The second line is for the heal. To adjust this last tread to the correct position, simply look at either of the first two treads and measure the distance from the back of the tread bracket to the bottom ridge of the stringer and adjust the last tread to a similar position (for example, if your rise per tread is 7-1/4 in., then the distance from the tread bracket to the bottom ridge of the stringer will be about 1/4 in.). To mark this second line, place a square (or speed-square) on the surface of the tread next to the stringer and mark a perpendicular line flush with the back of the tread surface. Either pivot the treads out of the way or remove them completely, then make the cuts. Lay the now-correctly-cut stringer on top of the second stringer to trace the lines and make the cuts on the second stringer. Now attach all the treads to the stringers. Return the treads back to their original positions (using the pivot points and the distance between the back of the tread bracket and the bottom ridge of the stringer from before) and use 1-1/4 in. screws to fill the rest of the holes attaching the treads to the stringer. As you attach one tread at a time, measure to verify your rise per tread between each tread and the one next to it. After all the treads are attached to one stringer, flip the assembly on top of the second stringer. Use the punch-mark pivot holes, same as with the first stinger. Measure to verify your rise per tread as you go. Fill all the holes with 1-1/4 in. screws. |
Setting the StairThe stair is attached to the platform with two hurricane-style brackets. To attach these brackets to the stringers, use four 1-1/4 in. screws on the outside of the stringer as shown in the video - attach each bracket about one inch away from the top of the stringer (so that the bracket attaches to the platform below the decking) and flush with the back end of the stringer. After the brackets are attached to both sides of the stair, rest the stair assembly in place against the platform so that it is centered on the platform. Adjust the stair's placement so that the distance from the top of the platform to the top of the tread below is the same as your rise per tread. Use four more 1-1/4 screws to attach the other side of each bracket to the platform, and also use one 2-1/2 in. construction screw (heavy duty) in the top hole of the bracket. |
Stair RailingUsing the 2-1/2 in. screws provided, attach the bottom of each baluster (which is the end with two predrilled holes) to the outside of the stringer using the baluster punch marks (the line of punch marks that are closer together). Next attach the top of each baluster to the stair hand rails using the punch marks along the lower side of the stair handrail. After all the holes at the tops of balusters have been filled, use a level to make sure the balusters are vertical. Apply screws through the remaining pre-drilled holes of the balusters. To attach the stair handrail to the platform's top rails use the special block provided. Place the block between the two rails so that the largest flat side is against the platform's rail and the half-arrow shape is of the block is pointing away from the stair, as shown in the video. Attach the rails and block together with two 3 in. screws. You should trim and sand the top corner of the stair hand rail. Attach the structural baluster at the toe-end of the rail so that it is flush with the end of the stair handrail. At the bottom of the structural baluster, fill one of the holes with a 4 in. construction screw, which will go into the tread, and the remaining holes with 2-1/2 screws. More about the Quickporch stair |
|
Quickporch • 5961 East 64th Avenue • Commerce City, Colorado 80022 • 303-287-9166 |