  |
43 in. PlatformIntroduction: 43 KitTools needed:
Parts included in 43 in. platform:
Save the more attractive components for the more visible sides of the deck. |
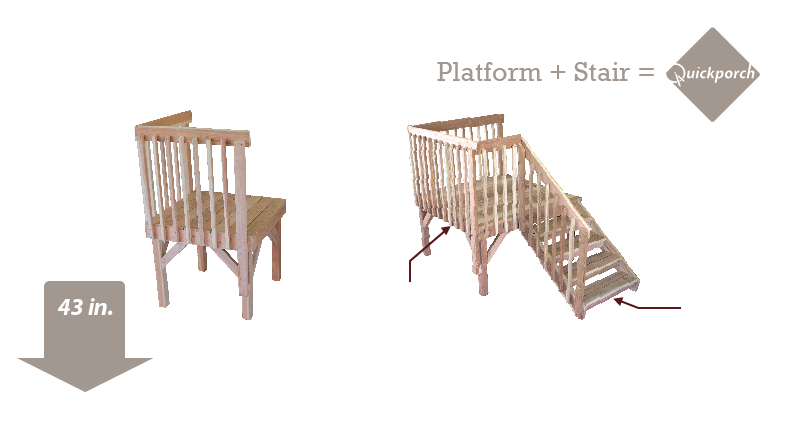
Orientation to HomePoint the side of the platform with the notched over-hang in the direction you want the stairs to the ground. Be aware of the building code in your municipality, especially regarding the posts contacting the ground. In many cases where the deck would be installed on a surface such as grass or dirt, you will also be required to have concrete blocks under the posts. |
Height of PlatformSide to side: Up and down: Cut the two back posts to the two vertical measurements above MINUS 1 in. (which is the thickness of the decking). Remember to save the two most attractive posts for the front of the deck. |
Installing Posts and BracesTo install the back posts (the posts you just cut to length), first flip the platform upside-down; attach each posts with 3 of the 4 in. construction screws using the pre-drilled holes. Then apply a pair of braces with 8 - 2-1/2 in. screws using the pre-drilled holes (4 screws for each brace). Place each brace flush with the outside of the post and inside the rim. Flip the deck back into place in front of the door. Use a temporary support for the front of the deck, then use a level to achieve a level platform. Measure for the two front posts, then cut to length and attach with construction screws and braces, just like the back posts. |
Platform RailingUsing the 2-1/2 in. screws provided, first attach the bottom of each baluster (which is the end with two predrilled holes) to the platform using the corresponding punch marks on the platform (the punch marks indicate where the screw should pierce the side of the platform). On both top rails, locate the x-marks the ends. The x-mark indicates where that particular end should not be visible, whether it terminates into the the other top rail or close to the wall of the house (approximately 1-1/2 in. away from the wall of the house). Use the x-marks and punch marks to determine the orientation of each top rail. Next attach the top of each baluster to the top rails using the punch marks along the lower side. For both rail sections, use a level to make sure the balusters are vertical. Attach the two top rails together where they meet at the corner using 2 - 3 in. screws. Next, apply screws through the remaining pre-drilled holes of the balusters. TWO 58 in. STRUCTURAL BALUSTERS (NOT ON THE INSTRUCTIONAL VIDEO): On each structural baluster, there are two pre-drilled holes at the top, four holes in the middle and one hole at the bottom:
|
|
Quickporch • 5961 East 64th Avenue • Commerce City, Colorado 80022 • 303-287-9166 |